Sunday, April 10, 2011

Gremlins in the Gremmental


Last weekend I had a go at making Emmental cheese. The recipe suggested that doubling the batch would make a bigger wheel and allow bigger eyes to develop. So I got my biggest stainless steel pot and filled it with about 14 litres of raw milk – which was about the limit of my ability to lift a liquid load which had potential to slosh about. The recipe seemed pretty straight forward add culture, add the Swiss cheese culture, ripen, then add rennet. Then it was time to slowly heat the curd, stir every 5 minutes until it got to a particular temperature . I tried doing it in the kitchen sink but then the hot water ran out and I transferred it onto the stove, still stirring away. Actually I was able to read a book at the same time so it wasn’t time completely wasted. Then into the cheese press for a regimented number of minutes at a specific weight etc. Halfway through the pressing I realised that the recipe page had flipped over to the Gruyere recipe, which although had the same ingredients and initial stages had quite a different pressing regime. So I suddenly had to rush to the press and change the weight. Well I don’t know if it was the stuffed up pressing or the doubling of the recipe without changing the amount of pressing time or weight but I think something has gone wrong. There are great cracks in the cheese and it hasn’t improved with a week in the cheese cave. It is now time to sit it in a warm room for 2 or 3 weeks to let the proprionic shermanii bacteria do their thing and make the eyes….or completely explode it apart. Time will tell. Stay tuned.
But on the other hand, my blue cheese is starting to go blue as per the recipe said it would.. 

Sunday, April 3, 2011

Blue Cheese and Red Tomatoes


Last weekend I decided to have a go at making some blue cheese using a slice of bought blue as the innoculant for penicillium roqueforti. It wasn’t too complicated – blend up the cheese with some water until it was a liquid and add to the milk with the starter.


After renneting and cutting the curd into 1cm cubes, it just needed stirring every five minutes for an hour which allowed me time to be doing something else in the kitchen (making tomato paste ready to bottle later). I then had to drain the curds in a colander , mix in a bit of salt and then drain again in a mould flipping every 15 minutes for the first 2 hours and then every hour for the next 2 then overnight.  ! It sat in the cave on  a board, rubbed with salt and turned daily for the next 3 days and then was pierced with a sterilised knitting needle to create some holes in it so that the mould has pathways through which it can spread.. Now it just has to sit in a mini cave (plastic box) within the cave to try to increase the humidity for several weeks to let the mould develop fully. I think it is about 6 months until it is ready to eat.


Meanwhile I was boiling down lots of tomatoes to make some tomato paste to use as pizza toppings in the year to come.  The tomatoes are ripening thick and fast now so I have lots to choose from. The Roma tomatoes that I grow for bottling are comparatively dry to other varieties like Rouge de marmande. This makes them great to bottle or dry as there is less watery flesh to boil down.  I was very pleased to end up with 12 bottles of paste by the end of the day.  On Saturday I put some on to dry as well.  I realised when I finished that last year I just halved rather than quartered them which made for a better resulting shape. The quarters end up shrivelling too much. Anyway there are plenty more out in the garden to do some next weekend.


Tuesday, March 29, 2011

Who said pumpkins don't grow on trees?


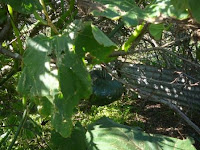
Who said pumpkins don’t grow on trees. I just had to take photos this weekend of these silly pumpkins of mine which insist on growing up and over the plum trees rather than trail on the ground. I had to pick one this weekend as it was getting to heavy it was beginning to split at the stem.
I decided to harvest my butternut pumpkins too as they had stopped growing after an overnight cold snap we had a couple of weeks ago. Now they are hanging in wire baskets in the shade out of reach of frost, possums and rats!

Monday, March 21, 2011

Cccccheese


It feels like a while since I made any cheese so this weekend I spent 2 days making some new cheeses to put in my new “cave”. A few weeks ago, I decided to splurge and buy myself a little wine fridge in which I can control the temperature to that needed by most cheeses to mature. A normal fridge is too cold for maturation to occur, so instead of relying on the coolest room in the house(which was often too hot), I decided to invest in a small wine fridge which can be set anywhere from 5°C to 18°C. Now I just need to fill it up a bit. It just fits in nicely into the newly renovated storeroom.
the new cheese cave


First cheesemaking day, it was Cotswold on the menu. This cheese has dried onion and chives added to the curds before pressing so it should turn out to be quite savoury although surprisingly, there was no salt added anywhere in the process. The pressing process was a multi phase one with the last pressing lasting for 24 hours. It dried quite quickly and I was able to wax it the next day.
Cotswold before waxing

After waxing

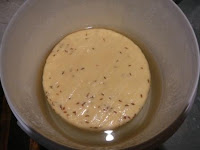
Gouda with Cumin seeds was next on the list. The process is a bit different from other cheeses I have made so far as it entailed heating the curds by drawing off some of the whey and replacing it with very hot water. I am not sure how this makes the end product different than that from heating the curds from outside the pan….but I am sure there is one. Woops, I have just remembered that I have to wash it with some brine daily….back in a minute. After 2 pressings of 10 kg for 12 hours (actually I cheated and did the first one for 10 hours just so that I didn’t have to get up at 1am) it was ready for a three hour soak in a brine bath and then a  three week spell in the cave with daily brine washing.
Gouda with cumin seeds
Soaking in a brine bath
 I just hope I remember to do it tomorrow, and the next day and the next……It will be ready for waxing in about 3 weeks and then be ready to taste in a few months.  

Monday, March 14, 2011

Tomato Time.....finally

At last we have had some warmer weather to help the tomatoes to ripen. This is the first weekend I have had enough to bottle some tomato puree ready for the winter…so 12 bottles done,  another few dozen to go. I like to bottle at least 50 small bottles to tide me over until the next tomato season.  No tinned tomatoes for me! I use them in any recipe that requires tinned tomatoes from pizza to paella. If I still have tomatoes to harvest after I have achieved my target number of bottles, I like to boil down puree to make a paste , semi dry them or make sauce and chutney 
 I heard on Saturday's gardening talkback radio that it is the cooler ripening conditions which make Tassie tomatoes taste so much better. Tomatoes ripen best at 24.5°C – how on earth did they work that out???- so if you are ripening them in a warmer climate, they lose a lot of their flavour. I have always thought that my tomatoes were pretty tasty, now I have the reason why. I am sure all that calf shed bedding mulch that I use in the vege garden helps add to the flavour as well!

Friday, March 4, 2011

Zucchini and more Zucchini

Amazingly, because this summer was virtually non existent, I haven't had the huge huge glut of zucchini that I normally get. However I have still been getting a few so this weekend I decided to put down a few jars of zucchini pickles. I have 2 recipes. One is by Sally Wise and comprises zucchini, onion, capsicum soaked in a salty brine then brought to the boil in some vinegar spiced with mustard and bay leaf. It is really easy to make and tastes great.
The second recipe is one by Maggie Beer. It involves finely chopping zucchini, onion and lemon peel and salting them overnight. Bring to the boil in vinegar spiced with chilli, mustard and turmeric. The lemon adds a lovely flavour to this pickle so it is worth the extra bit of chopping required.
Ready for the cupboard

Wednesday, February 23, 2011

The Brie begins to bloom

After 10 days, my Petit Brie is starting to get quite a bit of mould growth - more around the sides than the top and bottom yet. So far it is looking much more promising than my failed Camembert which never even got to this stage over a month of waiting. On the weekend, we had two visitors from France, one from the north and one from the south. They were great cheese lovers - what a pity my Brie wasn't ready for tasting. The area in the north where Sam came from produces a mould ripened cheese that smells like smelly socks, maybe a bit like my first Camembert which I didn't like all that much because it was so strong (and smelly sock-like).